How to Animate (Simply) in Procreate
Updated: Aug 6
Contents:
Before We Start!
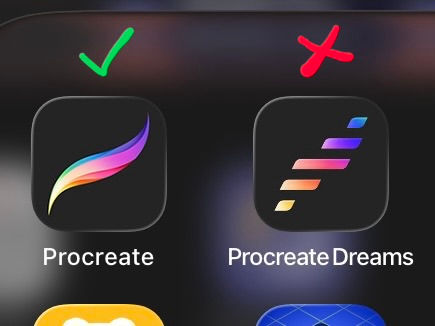
This article explains how to use the animation feature in the app Procreate. If you want to learn about using the animation app Procreate Dreams, there are plenty of other tutorials to explore.
So, let’s get started!
What All You Need
Materials:
A device that can run Procreate
A pen or stylus that connects to your device
(Optional) A drawing glove
Skills:
Basic knowledge of how to use Procreate
An active imagination!
What We Will Be Making:
Steps
Set up your canvas:
|  |
|  |
|  |
| 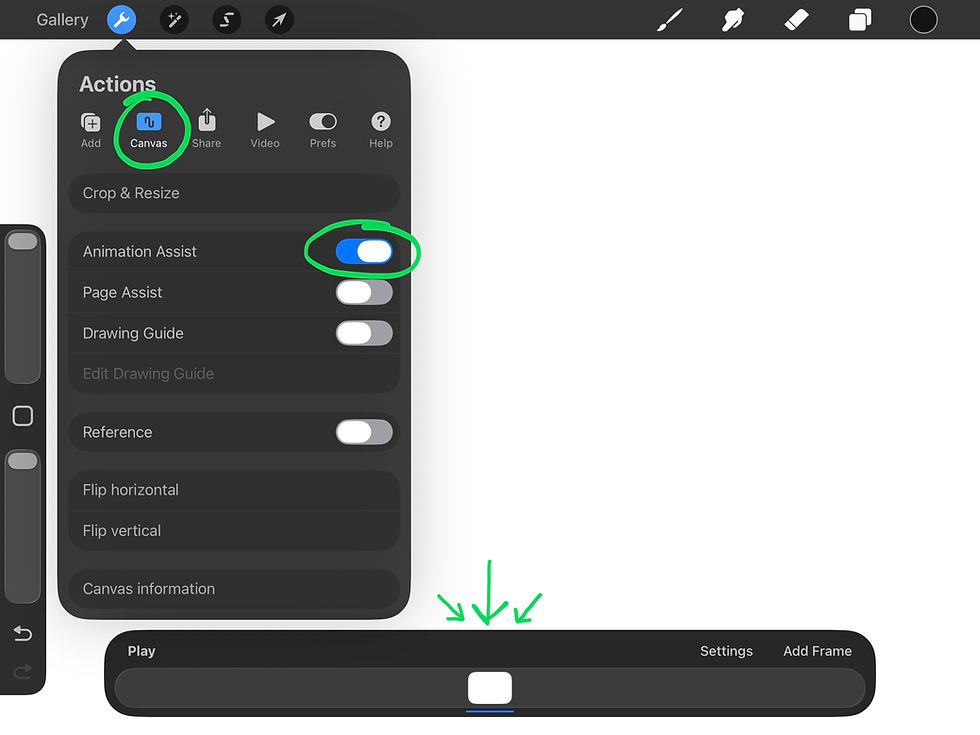 |
Go to Canvas > Drawing Guide > Edit Drawing Guide. Now you can edit the drawing guide for your visibility preferences. (I recommend making the Grid size 1 inch.)
Select the blue check mark.
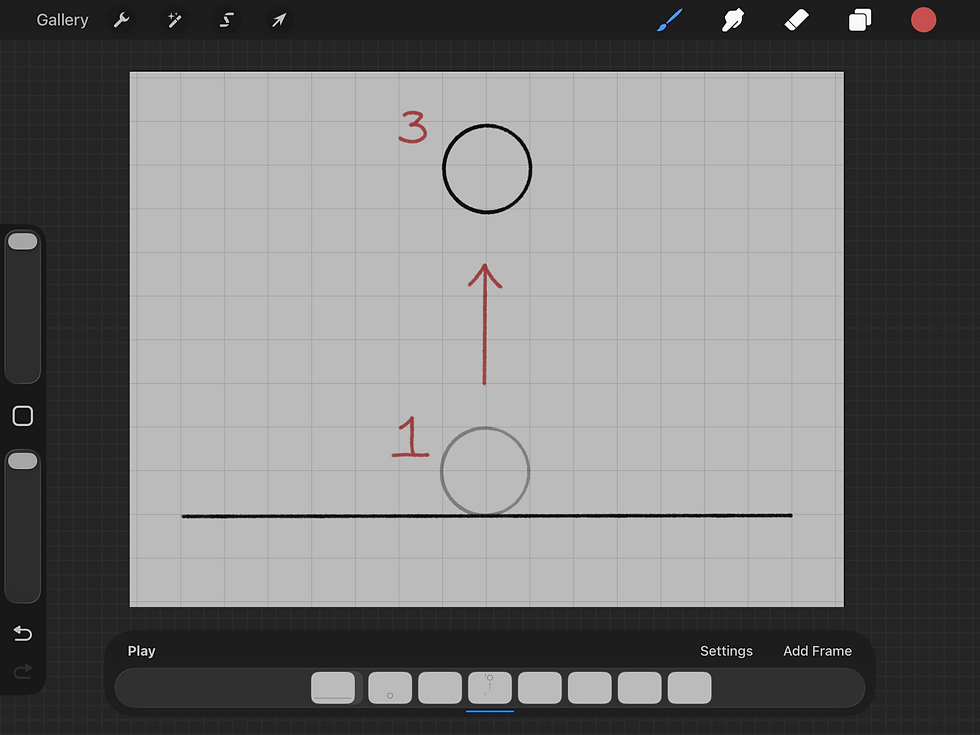
Begin your animation:
 | |
|  |
|  |
|  |
|  |
|  |
|  |
|  |
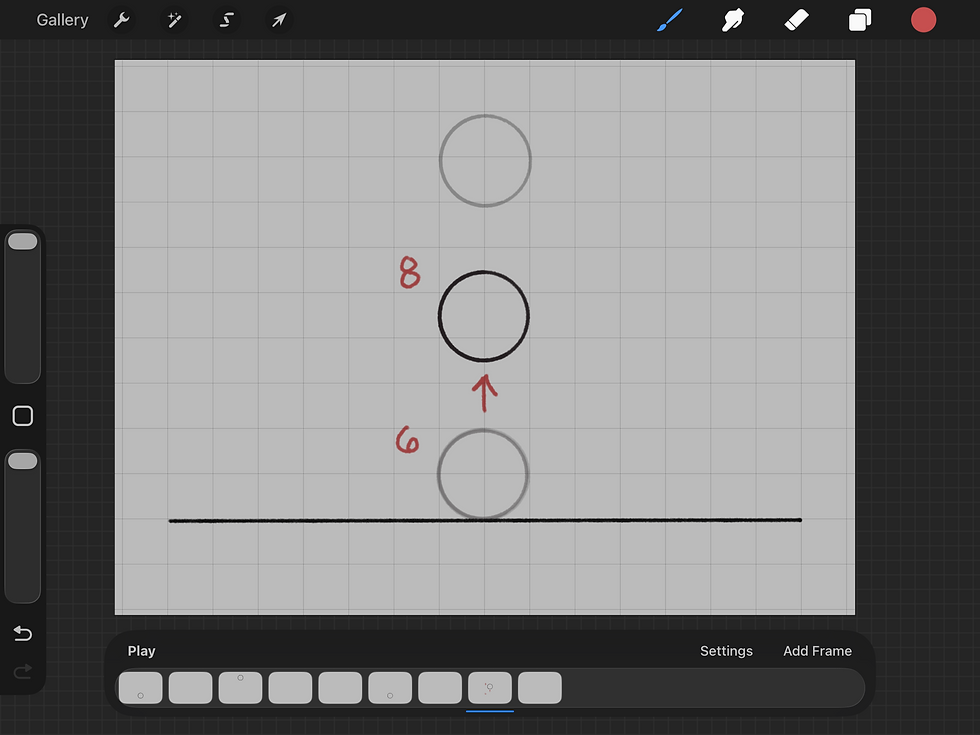
(NOTE: Red numbers represent frames - NOT steps)
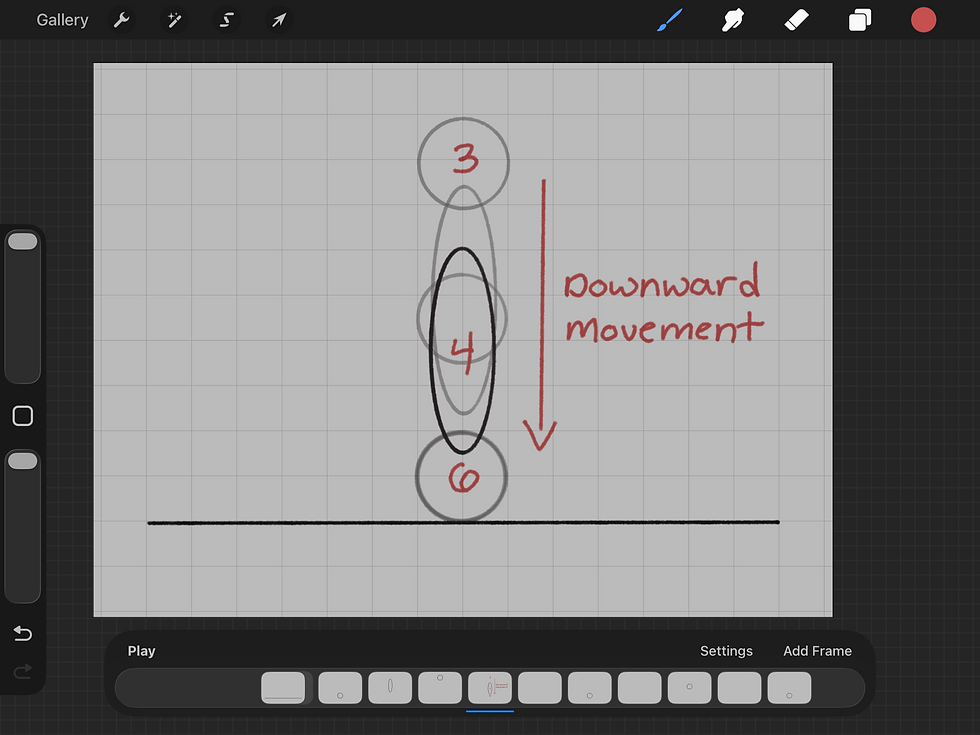
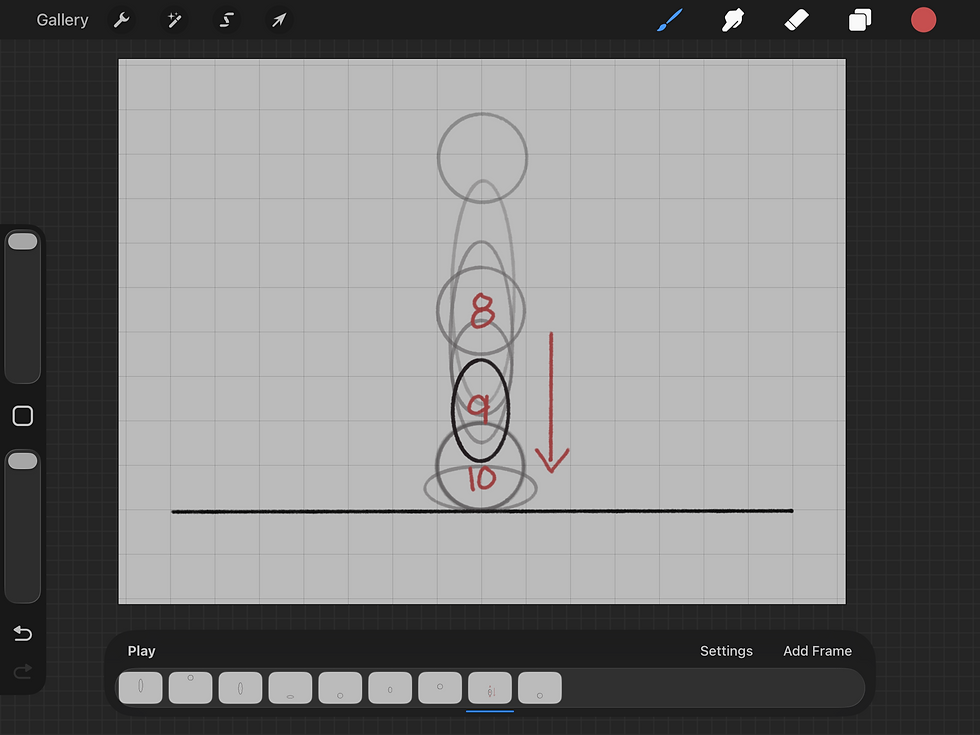
Congratulations! You’ve drawn all your key frames! Now, we can use those blank frames to make some in-betweens.
|  |
|  |
|  |
| |
 |  |
|  |
Go to settings and change “Frames Per Second” to ten. This slows down the animation a little

Congratulations again! You’ve completed a simple ball animation. Give yourself a cookie.

Words to Know:
Frame (Animation Frame): A picture that makes up a video. A series of “frames” creates the illusion of movement.
G.I.F (Graphics Interchange Format): A lossless format for image files that supports both animated and static images.
In-between: The frames between the key frames that make the animation smooth.
Key Frame: The frame(s) that visually describe the movement best. These are the visual tools or “keys” for animators to keep up with all the movements they’re drawing.
Cookie: A sweet treat
To learn more animation terms, I recommend checking out the animation glossary by Brush Ninja.
Final Thoughts:
In this article, hopefully, I’ve helped you understand animating in Procreate better. There are so many programs out there, and you don’t necessarily even need a program. (Flipbooks are a thing, too!) I hope you’ve enjoyed reading, and I’ll see you in the next one.
Bye, Bye! ~


Comments